 Skip to content


How to Do Eyeshadow for Hooded Eyes Step by Step
Last Updated: November 7, 2026
Quick Summary
To do eyeshadow for hooded eyes, map your crease just above the natural fold with eyes open, then sweep a transition shade through that mapped line. Build a deeper matte shade in the outer corner, and finish with shimmer at the inner corner. Always check placement with eyes open after each step.
- Prime and set the lid with a matte skin-tone shade so shadow grips and does not crease.
- Partially hooded eyes map the crease 1-2 mm above the fold; deeply hooded eyes map 3-4 mm above.
- The easy version uses two shades and one brush and takes about three minutes.
- Older hooded lids do best with cream or satin formulas set lightly with powder.
- If shadow disappears when eyes open, the crease was mapped too low, move it above the fold.
Table of Contents
- Why Hooded Eyes Need a Different Eyeshadow Approach
- What You'll Need Before You Start
- How to Do Eyeshadow for Hooded Eyes Step by Step
- How to Do Eyeshadow for Hooded Eyes Step by Step Easy
- How to Do Eyeshadow for Hooded Eyes Step by Step Natural
- Step by Step Makeup for Older Hooded Eyes
- How to Apply Eyeshadow Step by Step for Beginners
- Troubleshooting Common Hooded Eye Problems
- Frequently Asked Questions
Why Hooded Eyes Need a Different Eyeshadow Approach
Hooded eyes have a fold of skin that covers part of the eyelid, so standard eyeshadow placement often disappears the moment you open your eyes. Learning how to do eyeshadow for hooded eyes step by step starts with one idea: map the crease above your natural fold, not inside it.
Most tutorials skip this. They show a blended look on a model with visible lid space, then wonder why it fails on hooded lids.
Here is what actually changes:
- Lid space is limited. Color needs to sit higher to show.
- The fold eats shadow. Anything below it vanishes when eyes open.
- Blending matters more. Hard edges look harsh on a smaller canvas.
The good news?
What You'll Need Before You Start
A small, well-chosen kit works best: an eyeshadow primer, a matte skin-tone shade, a transition shade, a deeper crease shade, a shimmery accent, and two brushes. That's it.
Here's the full list, plus why each item earns its place:
- Eyeshadow primer for a smooth base that holds color
- Matte skin-tone shadow to set the primer and even out the lid
- Matte transition shade one or two steps deeper than your skin
If you're building your kit from scratch, browse the full Eyes category to gather everything the tutorial calls for. Formulas matter too. A finely milled shadow blends more easily on a small lid area.
How to Do Eyeshadow for Hooded Eyes Step by Step
The full process takes about ten minutes once you've practiced it: prime, set, map, transition, build, and brighten. Each step below has a checkpoint so you know it worked before moving on. The key difference from a standard tutorial is that placement decisions are made with your eyes open, because that is the only way to see what the fold will hide.
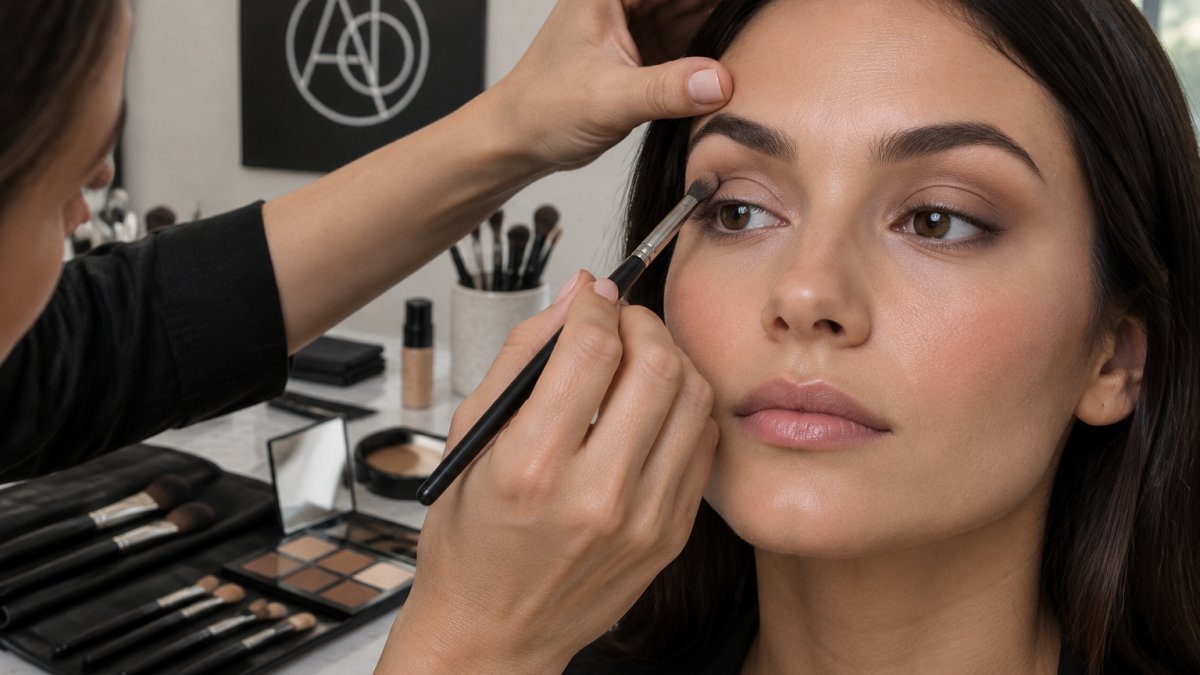
Step 1: Prime and Set the Eyelid
Start with a thin layer of primer across the entire lid, up to the brow bone. Wait a few seconds for it to set. Then press a matte skin-tone shade over the primer with a flat brush. This step stops creasing and gives the shadow something to grip. Checkpoint: the lid should feel dry and smooth, not tacky. If it still feels tacky, wait another 30 seconds before adding shadow, or the first layer will skip and patch.
Step 2: Map a Crease Above the Natural Fold
This is the step that makes everything else work. With your eyes open, look straight into a mirror and find where your natural fold sits. Your crease placement goes just above that line, on the visible part of the lid. Mark it lightly with a small brush. Checkpoint: with eyes open, you can still see the mark. If you can't, move it higher.
How high depends on your degree of hooding:
- Partially hooded eyes (fold covers only the inner or outer third): map the crease 1-2 mm above the fold, following the natural angle of your brow.
- Deeply hooded eyes (fold covers most of the mobile lid): map 3-4 mm above the fold, and extend the mark slightly past the outer corner so the color remains visible when the eye opens.
- Asymmetrical eyes (one lid more hooded than the other): map each eye separately with eyes open. Do not try to match the marks with eyes closed; they will look uneven when you open your eyes.
- Mature eyes (fold deepens with age): map higher than you think you need, because skin laxity increases throughout the day.
Step 3: Place the Transition Shade
Load a fluffy brush with your transition shade and sweep it through the mapped crease in small windshield-wiper motions. Keep the color soft and diffused. A palette with several neutral options makes this easier, since you can pick a transition shade that sits one or two steps deeper than your skin. The Ombres Artistiques range offers blendable, pigment-rich shades for exactly this kind of seamless crease work. Checkpoint: no hard edges, just a soft wash of color.

Step 4: Build the Crease and Outer Corner
Now deepen the look. Tap a deeper matte shade into the outer third of your crease and pull it slightly outward and up. This lifts the eyes and creates visible depth. A matte palette is the right tool here, since shimmer in the crease can scatter light and flatten the contour. The Ombres Velours matte shadows are milled to blend without fallout, which keeps the outer corner clean. Checkpoint: the depth reads clearly with eyes open.

Step 5: Brighten the Inner Corner and Blend
Press a small amount of shimmer onto the inner corner and the center of the lid. A precise pencil helps here, and the Le Crayon Dramatique Yeux Eyeliner Pencil works well for a tightline or inner-corner accent that stays put. Checkpoint: everything blends, nothing looks patchy.
| Step | What You Do | Time | Checkpoint |
|---|---|---|---|
| 1. Prime and set | Primer, then skin-tone shadow | 1 min | Lid feels dry, not tacky |
| 2. Map the crease | Mark above the natural fold | 1 min | Mark visible with eyes open |
| 3. Transition shade | Sweep through the mapped crease | 2 min | Soft edges, no harsh lines |
| 4. Build and define | Deepen crease and outer corner | 3 min | Depth reads with eyes open |
| 5. Brighten and blend | Inner-corner shimmer, lash line | 2 min | Blended, even finish |
Time
Watch out: the most common failure is mapping the crease with eyes closed. Always map with eyes open, then check the mark again after each layer, because shadow can shift the apparent fold line.
How to Do Eyeshadow for Hooded Eyes Step by Step Easy
The easy version uses two shades and one brush, and it takes about three minutes. Skip the deep crease work and rely on a single matte shade swept above the fold.
Here's the shortcut:
- Prime and set with a skin-tone shade.
- Sweep one mid-tone matte above your natural fold.
- Add a touch of shimmer at the inner corner.
- Blend the edges with a clean finger.
That's a complete everyday look. No layering, no precision work, no stress. Watch out: skipping primer is the mistake that undoes this shortcut, because unprimed shadow slides into the fold within an hour.
How to Do Eyeshadow for Hooded Eyes Step by Step Natural
A natural look keeps every shade close to your skin tone and leans on soft blending. The goal is definition you can barely see, not color that announces itself.
Follow the same five steps, with three adjustments:
- Choose a transition shade only slightly deeper than your skin
- Skip the inner-corner shimmer, or use a satin finish instead
- Keep the outer-corner shade one step lighter than you would for evening
The result reads as "awake," not "made up." This is the version most people can wear to work every day.
Step by Step Makeup for Older Hooded Eyes
Older hooded lids need a lighter hand and a few smart swaps. As lids lose firmness, heavy shadow and hard lines tend to settle into texture.
Three changes make a real difference:
- Use cream or satin formulas on the lid, then set lightly with powder. Cream shadows move with the lid and resist settling into fine lines better than powder alone.
- Keep shimmer at the inner corner only, away from the fold. Shimmer on the hood itself catches light and makes the fold look heavier.
- Place the crease shade higher as the fold deepens with age. A common pattern is to map 2-3 mm higher than you would on a younger lid, then check with eyes open before blending.
Soft blending matters more than ever here. Build color in thin layers rather than packing it on, and check the result with eyes open after each pass.
Watch out: matte shades that are too dark or too cool can look harsh on mature skin.
For a complete mature-eye look, follow the same five steps as the main tutorial but extend the transition shade slightly above the mapped crease and skip the outer-corner deepening on the most hooded eye if the skin is very lax. The result should look lifted, not painted.
How to Apply Eyeshadow Step by Step for Beginners
Beginners should master placement before technique. If you can map a crease above the fold, you can build any look on top of it.
Start with these habits:
- Practice the mapping step with eyes open, not closed
- Use two brushes at most until the motions feel natural
- Blend in small circles, not big sweeps
- Build color in thin layers, checking as you go
Once the basic five steps feel automatic, you can expand into bolder looks. Our step-by-step guide to artistic makeup looks for beginners walks through more advanced color work when you're ready.
Troubleshooting Common Hooded Eye Problems
Most hooded-eye issues trace back to placement or prep, not the product itself. Here are the fixes for the problems we hear about most.
- Shadow disappears when eyes open: the crease is mapped too low. Move it above the fold.
- Color looks muddy: too many shades blended together. Use fewer, and blend each one before adding the next.
- Creasing within hours: primer was skipped or the lid wasn't set with powder.
- Harsh outer corner: the brush was too dense. Switch to a fluffier one and blend outward.
One more tip: check your work with eyes open after every step. That single habit catches most problems before they compound.
Hooded eyes don't limit what you can create. They just ask for placement that respects the fold, and once you've practiced the mapping step a few times, it becomes second nature.
Frequently Asked Questions
What is the best eyeshadow technique for hooded eyes?
The most reliable technique is to apply color with your eyes open and map the crease above your natural fold. Start with a primer, set it with a skin-tone shadow, then place a matte transition shade slightly higher than where your crease sits when open. Build deeper color on the outer corner and blend upward, not outward. This keeps color visible instead of disappearing into the fold when you look straight ahead.
What eyeshadow colors look best on hooded eyes?
Matte mid-tone and deep shades create the most visible definition on hooded lids because they absorb light and read as contour. Warm browns, taupes, plum, and charcoal work well as crease and outer-corner shades. Shimmer and iridescent finishes are best kept on the lid center and inner corner, where they catch light without emphasizing the fold. Pair a matte transition shade with a luminous accent for balance.
How can you keep eyeshadow visible when your eyes are open?
Apply every shade with your eyes open and check the mirror between steps. Place the crease color higher than feels natural, roughly where you want the visible contour to sit when looking straight ahead. Blend upward toward the brow bone rather than side to side. A long-wearing primer and a matte formula with strong color payoff prevent fading and creasing through the day.
How do you apply eyeshadow to mature hooded eyes?
Use a smoothing primer and a light hand with matte formulas, since shimmer can settle into fine lines. Keep the crease shade soft and blended upward, and avoid heavy product directly on the hood. A brightening shade on the inner corner and a thin line along the upper lash line lift the eye. Creamy, blendable textures and small brushes give more control than large fluffy ones.
